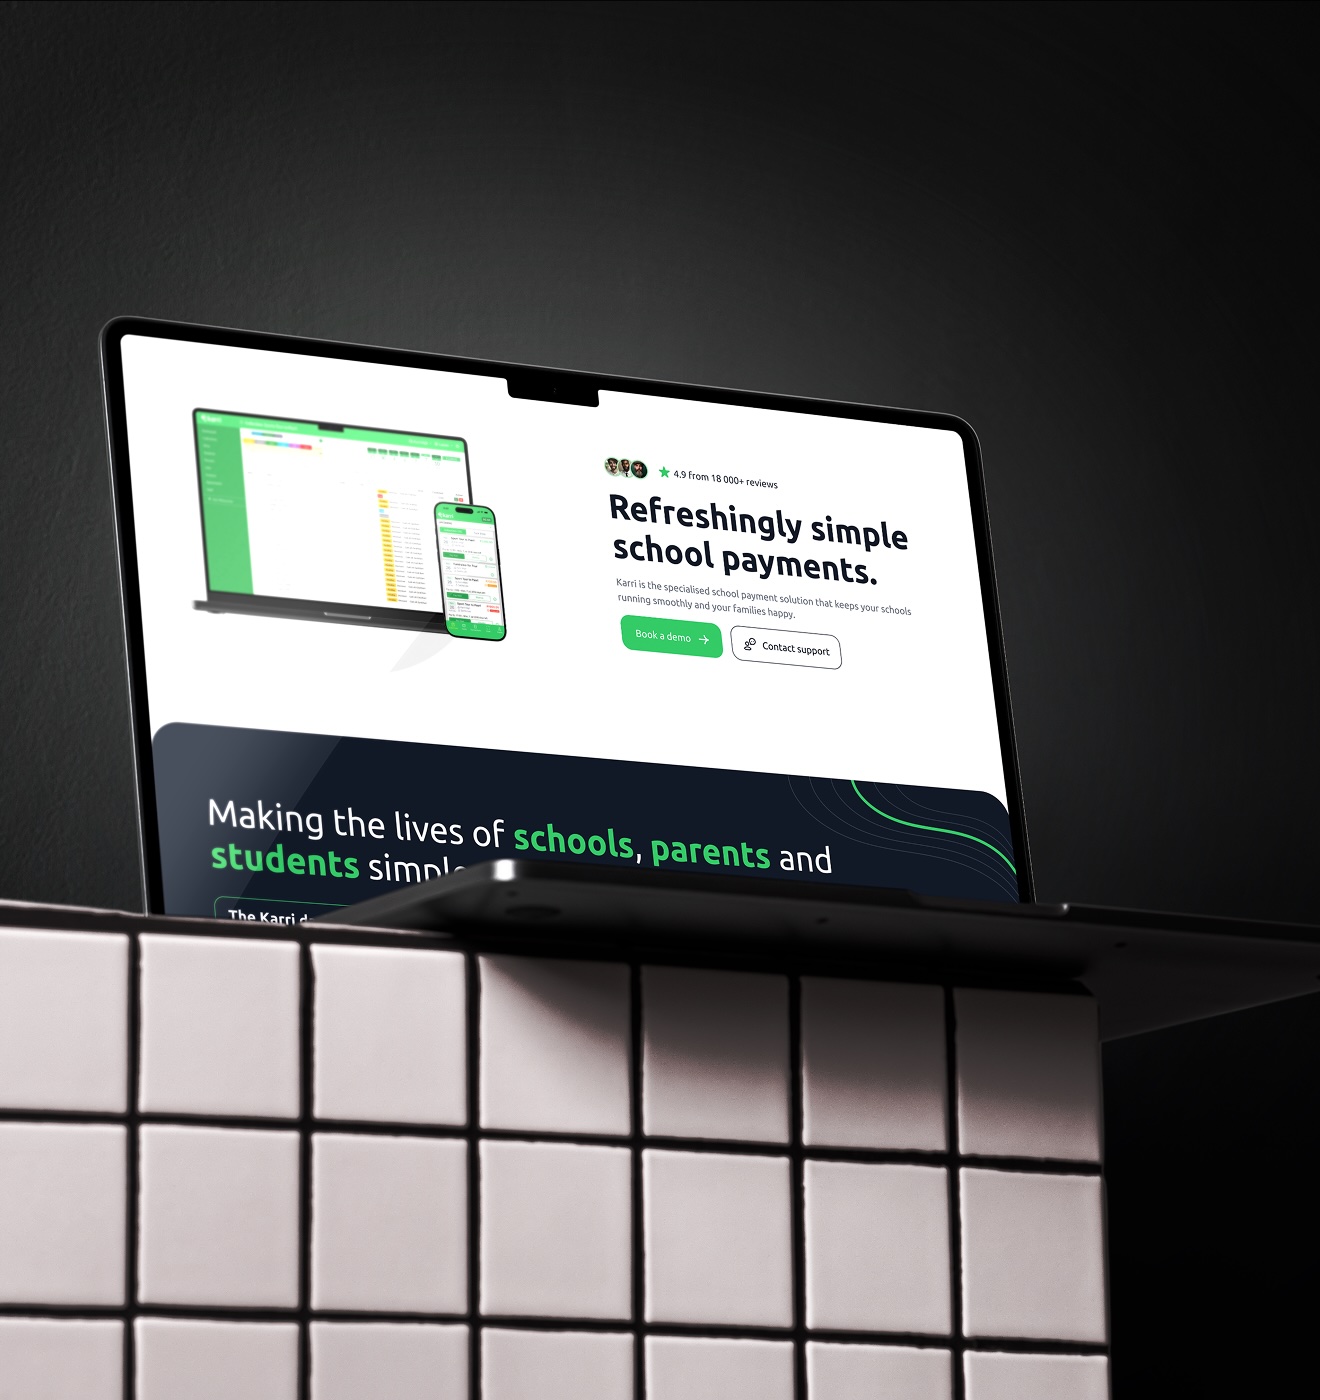
We are a full-service digital agency dedicated to creating, developing, and marketing high-performing digital experiences. From initial concept to final growth strategy, we blend innovative design with robust development to help your brand thrive. Our end-to-end solutions ensure your digital presence is seamless, impactful, and built to drive measurable results.
25%
Increase in conversions after engaging with Tecbot for a UX/UI overhaul
68%
Increase in ticket sales with the launch of a new ticketing platform
60%
Decrease in cost per acquisition after moving paid media campaigns to Tecbot
243%
Increase in sales across digital channels after a website redesign and ongoing digital marketing campaign management
About us
Driven by creativity and powered by technology, we turn ideas into impactful results. Our focus is centred around the integration of three pillars - Design, Build & Reach.
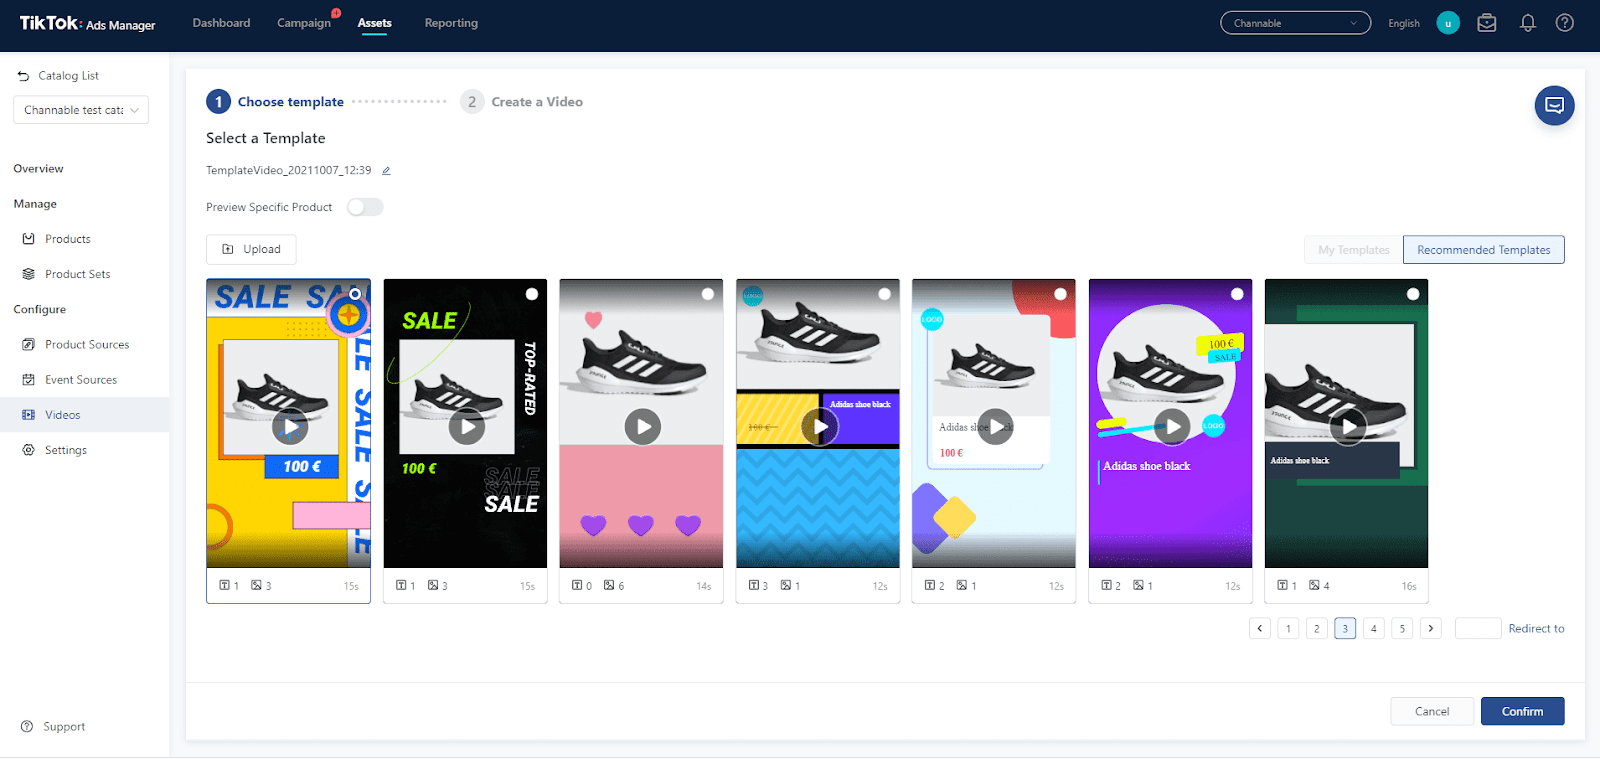
Are you ready to take your advertising efforts to the next level on TikTok? TikTok's Dynamic Showcase Ads provide an excellent opportunity to showcase your WooCommerce products to a vast audience who have already interacted with these products, driving conversions at a low cost.
In this comprehensive guide, we will walk you through each step of setting up these retargeting ads on Woocommerce, ensuring seamless integration between Tag Manager, WooCommerce, TikTok Ads, and most importantly, how to ensure you collect content IDs! By following these detailed instructions, you can successfully set up TikTok Dynamic Showcase Ads on your WooCommerce store and maximize your brand's revenue from dynamic retargeting ads.
Prefer to watch?
We got you!
Step 1: Install and Set Up Tag Manager
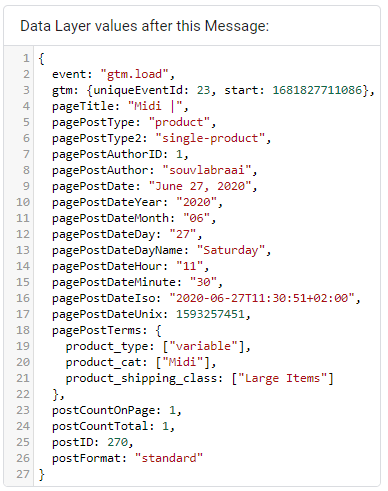
To begin, you'll need to install the GTM4WP (Google Tag Manager for WordPress) plugin on your WooCommerce store. Once installed, ensure that the necessary data layers are being pushed correctly with Tag Assistant, particularly the item ID. For this guide, we will use "postID" as the unique identifier. Confirm that the data layer is properly implemented on your product pages. (If you are unsure how to do this, watch our instructional video.
Step 2: Install the TikTok Pixel Template
Access your Tag Manager account and navigate to Templates > Search Gallery. Look for the TikTok Pixel template provided by TikTok. Install this template to simplify the integration of TikTok's tracking pixel into your WooCommerce store. The template will automatically set up the necessary tags and variables required for TikTok Dynamic Showcase Ads.
Step 3: Create a DataLayer Variable
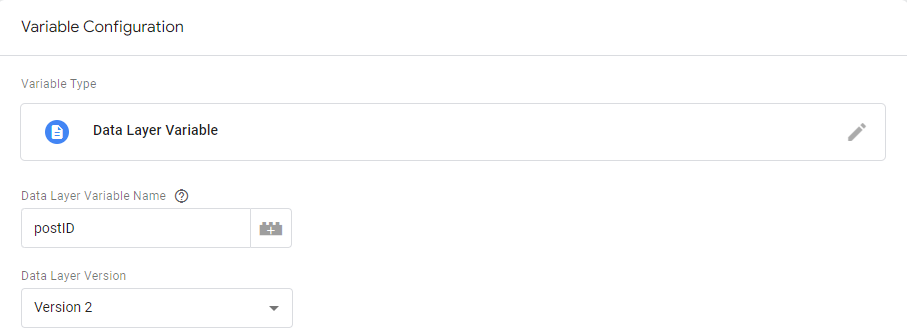
In Tag Manager, it's essential to create a variable named "DLV" (DataLayer Variable). This variable will capture the data layer values and pass them to the TikTok pixel. To create the variable, go to Variables and click on "New." Name the variable as "DLV - “Your unique identifier. Ours was postID.”
Step 4: Set Up TikTok Tag for View Content Event
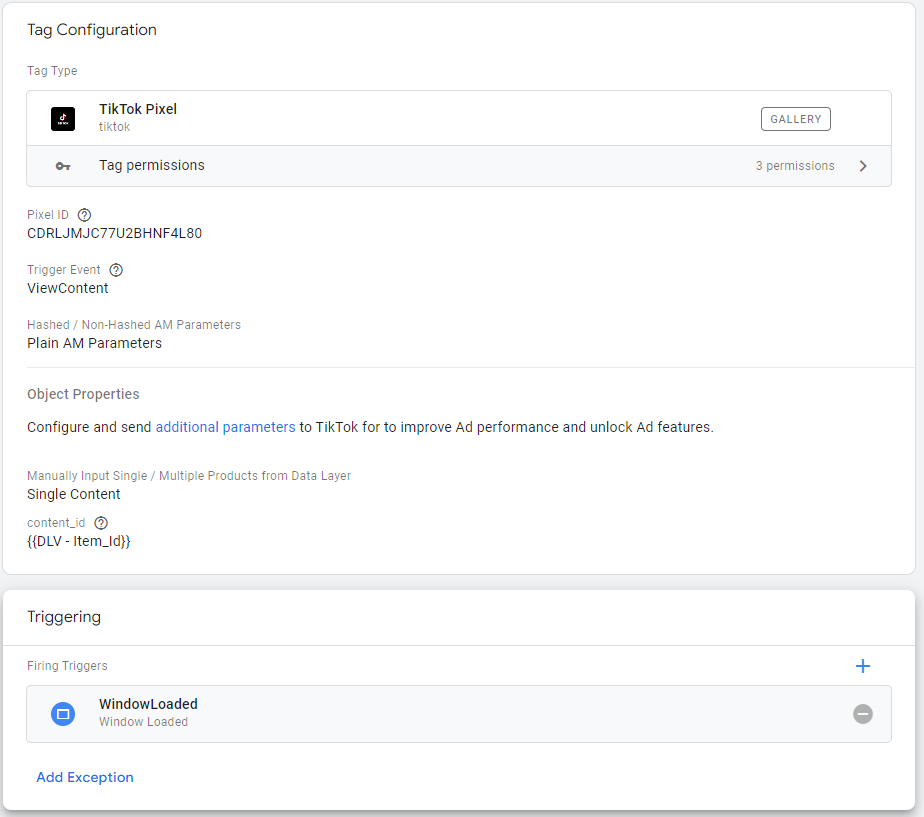
With the TikTok Pixel template installed, it's time to create the tag for the "View Content" event. In Tag Manager, go to Tags and click on "New." Name the tag as "TikTok - View Content" and select the TikTok Pixel template. Under the content ID field, click on the icon and select the "DLV" variable you created in the previous step. Set the content type to "product" to align with your WooCommerce store's offerings.
Step 5: Create a WindowLoaded Trigger
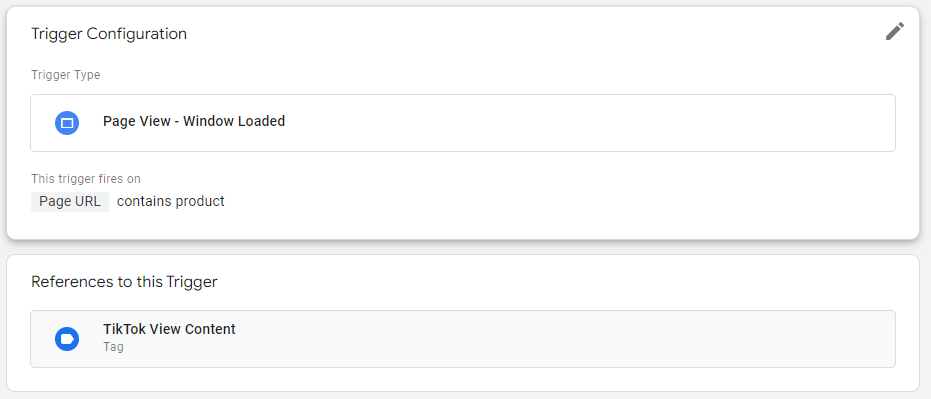
To ensure that the TikTok tag fires accurately on relevant pages, you need to create a Window Loaded trigger. In Tag Manager, go to Triggers and click on "New." Name the trigger as "WindowLoaded - Product Pages." Set the trigger type to "Window Loaded." To limit the trigger to product pages, configure the trigger conditions to fire when the Page URL matches a specific pattern or contains specific keywords related to your WooCommerce product URLs. Ours was - Page Url contains “https://dev2.devbot.co.za/product/”
Step 6: Verify TikTok Pixel Implementation
To verify the proper implementation of the TikTok pixel, install the TikTok Pixel Helper extension in your web browser. Visit your WooCommerce product pages and open the TikTok Pixel Helper extension. Verify that the "View Content" event is firing correctly and has been set up with custom code. This step ensures that the TikTok pixel is tracking the necessary data and will enable accurate measurement and targeting in your TikTok Dynamic Showcase Ads campaign.
Conclusion:
In this guide, we've outlined the essential steps to set up TikTok Dynamic Showcase Ads with Content IDs on your WooCommerce store. The next steps are
Create a catalogue in TikTok
Connect an event source, making sure that the catalogue and View Content event have matching content IDs